Data Loader is a client application used for bulk importing or exporting of data for Salesforce.
There are several actions insert, update, delete, or export Salesforce records.
Data Loader only uses comma-separated values(.csv) files to Import data or to Export data and few times it reads, extracts and loads data from database connection. When exporting data from Salesforce, Data Loader outputs the resulted data files as CSV file.
We can use Data Loader in two different ways:
User interface: When you use the user interface, we need to work interactively to specify the configuration parameters and CSV files used for import and export, and the field mappings that map the field names in your import file with the field names in Salesforce.
Command line in Windows: When we use the command line, we must specify the configuration, data sources, mappings, and actions in files. This will enable you to set up Data Loader for automated processing.
Key features of Data Loader :
Easy to use the Data Loader interface for interactive use
There is an alternate command-line interface for automated batch operations (Windows only)
Data Loader Supports large files with up to 5 million records
Drag-and-drop field mapping
Data Loader supports all the Standard objects, including custom objects
Can be used to process data in both Salesforce and Database.com
There is a detailed success and error log files in CSV format
A built-in CSV file viewer
It supports both Windows and Mac
Data Loader is used in most of the scenarios but mainly in these conditions:
When our requirement is to load more than 50,000 to 5,000,000 records at a time.
When ever there is a need for scheduled regular data loads, such as nightly imports.
When we need to export the data like backup purposes.
Some of the User Permissions :
There are few User Permissions needed for using Data Loader.
For example, A user who needs to insert records or update records in Salesforce using Data Loader need to have permissions like Create, Edit, Read, Modify-All on that object in Salesforce in order to create or update them.
First we need to install Data Loader in our system to start using it.
Launch the Data Loader app, To start any action we need to connect the Data Loader with Salesforce by providing the user credentials.
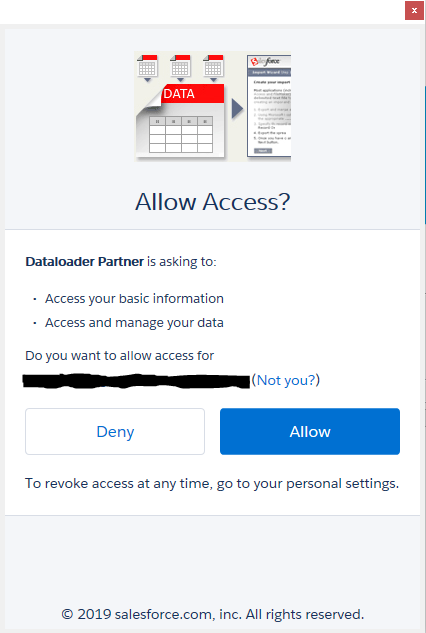
So first select the action which we need to perform. In order to get the login page we need to select any of the action button’s then it automatically redirects to the login page with two options as OAuth and Password Authentication. When we select OAuth we need to select the Environment like Production or Sandbox it redirects to Salesforce page for login credentials and if we select Password Authentication we need to provide our Salesforce login URL, username and password. After completing the insert action, there is no need of re-login again to perform any other action until the current session is active.
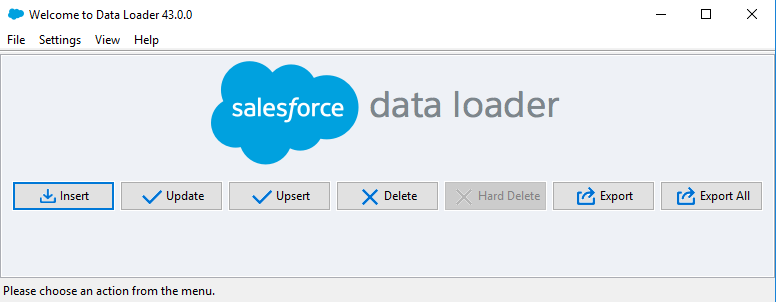


Using Data Loader.
We can use INSERT action for creating records in Salesforce to show how it works.
Select an object from the list for creating a record and select the file which needs to be attached to data loader to get the data from the file.

Now we need to map the fields which are present in .csv file with the fields in Salesforce to store the data in the same field in the record.

Click finsh button after field mapping.
We get popup for the data load result as the success file and error file. Both are .csv files stored in the local drive of the system.
